
Target the right visitors (segments, triggers, frequency)
Control who enters your campaign, what activates it and how often visitors see it, using segments, triggers and frequency.
The Wingify Guide can move a cursor on your screen inside the app and walk you through this, click by click (4 steps).
#When to use this
Your new checkout layout is designed for mobile, so you only want mobile visitors in the test. Or you want a pop-up variation to appear only after the visitor has scrolled half the page. The Targeting step answers three questions for every visitor: who qualifies (Segments), what activates the campaign (Triggers) and how often they see it (Frequency), plus how those conditions are re-checked on later visits (Settings).
#Before you start
- You have a campaign in Draft with pages, variations and metrics configured.
- For custom segments or triggers based on your own data, the matching attributes or events exist in Data Platform (Data Platform workspaces).
#Steps
#1. Open the Targeting step
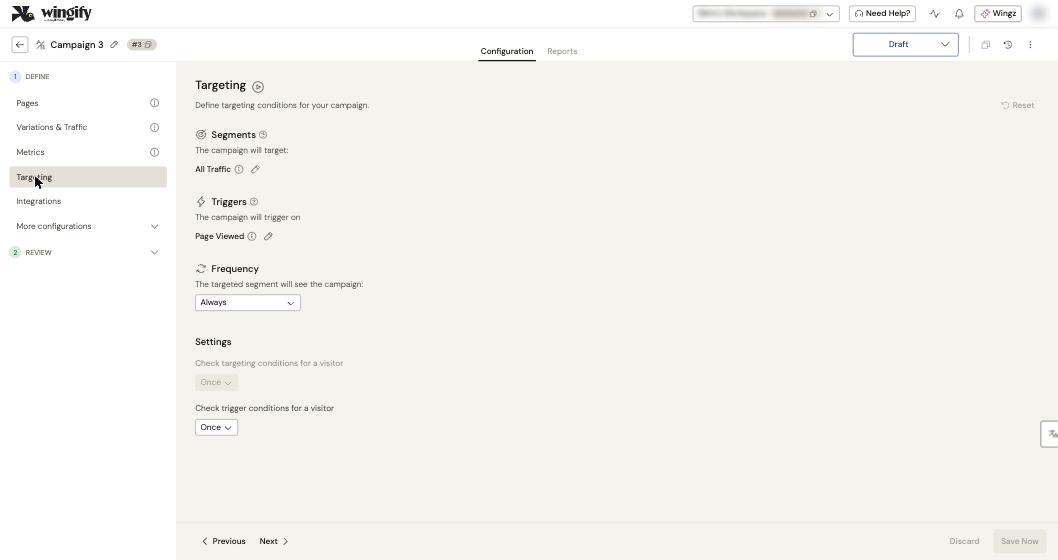
In your campaign, click Targeting in the left pane. By default, the campaign targets All Traffic, triggers on Page Viewed, uses Always for Frequency, and checks conditions Once.
#2. Choose a segment (who qualifies)
Click the edit icon next to All Traffic. The segment picker has four tabs:
- Standard Segments: ready-made audiences by traffic source, device, new vs. returning visitors and operating system.
- My Segments: segments saved in Data Platform. Click one to preview its conditions, then apply it.
- Custom Segment: build a one-off audience. The base is All Visitors; pick an attribute (it defaults to Landing Page URL), an operator and a value, and click + Add another condition to add more (combined with AND). Click Save Segment to reuse it later, or Apply for this campaign only.
- Copilot (Early Access): describe the audience in plain language and get a suggested segment.
Note: The segment applies to the whole campaign. In a multi-page test, all page groups share it.
#3. Choose a trigger (what activates it)
Click the edit icon next to Page Viewed. Pick a trigger from Standard Triggers (such as page scroll, leave intent or engagement), from My Triggers, or build one in Custom Trigger: choose Immediately or After, pick an event from Standard Events or My Events, optionally add filters with + where, then click Save Trigger or Apply.
#4. Set the frequency (how often)
Open the Frequency dropdown and choose Always, Once per visitor, Once per session, Once per day or At regular intervals.
Tip: For standard A/B and multivariate tests, keep Always so every visit counts. The "once" options suit personalization-style experiences where repeated exposure would skew results.
#5. Decide how conditions are re-checked
Under Settings:
- Check targeting conditions for a visitor: Once keeps a bucketed visitor in the campaign even if they no longer match; Every time re-evaluates on each visit. This option is not available with the All Traffic segment.
- Check trigger conditions for a visitor: Once or Every time.
Keep both on Once for stable bucketing unless your conditions depend on dynamic data such as cart contents.
Warning: With Every time, conditions are also evaluated on metric pages. If a visitor doesn't meet them there, their conversion isn't recorded.
#6. Save
Click Save Now, or Next to continue to Integrations. Avoid changing targeting once the campaign is running: it can affect the integrity of the experiment.
#7. Manage reusable segments and triggers (optional)
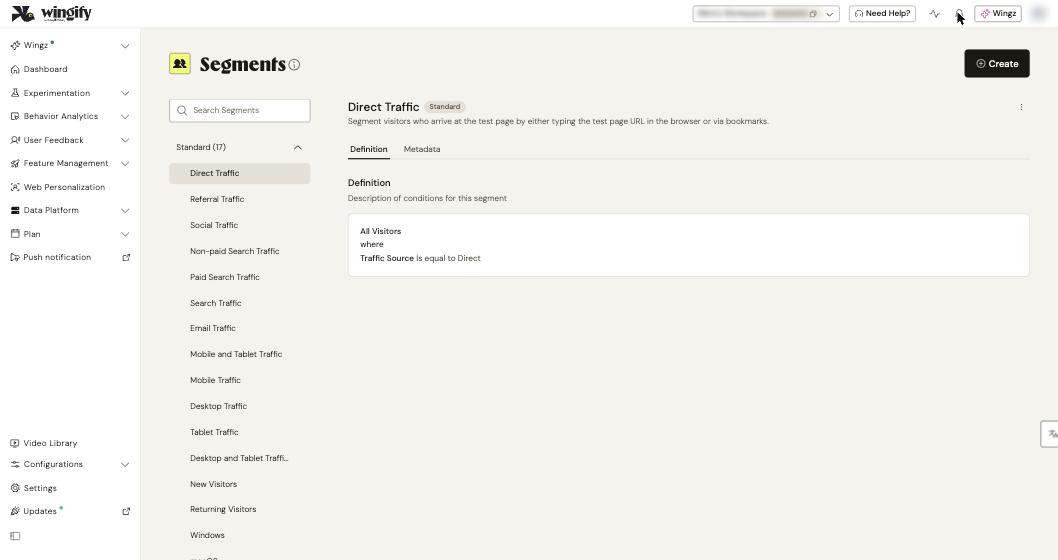
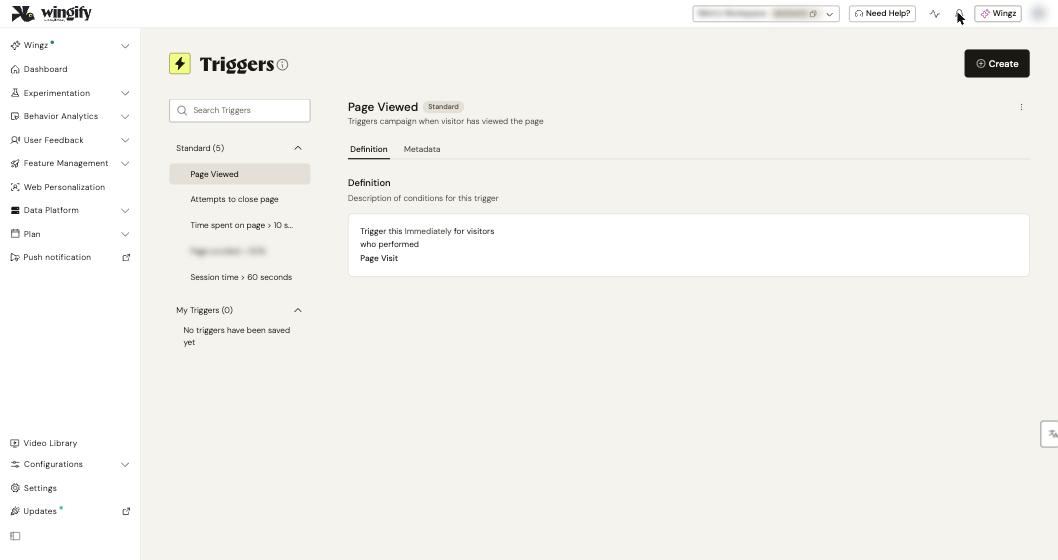
Go to Data Platform > Segments or Data Platform > Triggers to browse standard items, see their definitions, and click Create to add your own. Saved items appear under My Segments and My Triggers in every campaign.
#Check that it worked
- The Targeting step shows your segment name (or Custom) and trigger.
- In REVIEW > Live Preview, the QA Assistant shows whether targeting conditions are satisfied for your session, and lets you force the campaign when you don't match (for example, when targeting another country).
- Configuration summary lists the targeting you applied.
#Common questions
What's the difference between a segment and a trigger? A segment decides who may enter the campaign (for example, visitors from a given country); a trigger decides when it fires for them (for example, after they browse more than two pages).
Can I analyze results by segment without restricting the test? Yes. Keep All Traffic for targeting and apply segments to the report afterwards (post-segmentation). See Read your test report.
Why can't I change "Check targeting conditions"? It's not available when the segment is All Traffic. Choose another segment to enable it.
Can I edit a saved segment? Yes, users with Owner or Admin access can edit, clone or delete segments from Data Platform > Segments using the vertical ellipsis.