
Run your first A/B test
Create an AB - Single Page campaign, build a variation, pick a primary metric, choose your audience and start the test.
The Wingify Guide can move a cursor on your screen inside the app and walk you through this, click by click (6 steps).
#When to use this
You want to know whether a change to one page, such as a shorter checkout headline or a different call-to-action button, gets more visitors to convert. An A/B test shows the original page (the Control) to some visitors and your modified version (a variation) to others, on the same URL, and reports which one performs better on the metric you choose.
#Before you start
- The Wingify SmartCode is installed on every page you want to test. You can check a URL in Configurations > Websites and Apps > Debugger.
- You can publish campaigns. Users with the Design role can prepare a campaign but cannot move it to Running; Account Owners, Admins and users with Publish permission can.
- You know which single metric should decide the test (for example, clicks on the button you are changing).
#Steps
#1. Open Web Experimentation
In the left navigation, open Experimentation > Web Experimentation. This list shows all your web tests with their Status, Decision and Improvement.
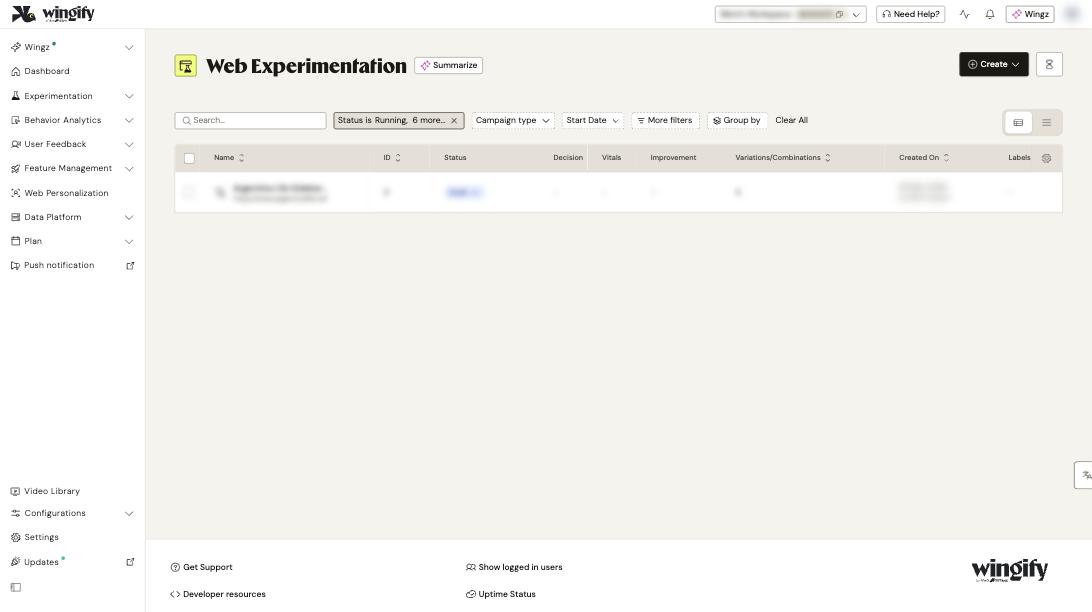
#2. Create an AB - Single Page campaign
Click Create in the top-right corner and select AB - Single Page. Wingify creates a draft campaign and opens its Configuration tab. The left pane lists the setup steps under DEFINE and REVIEW.
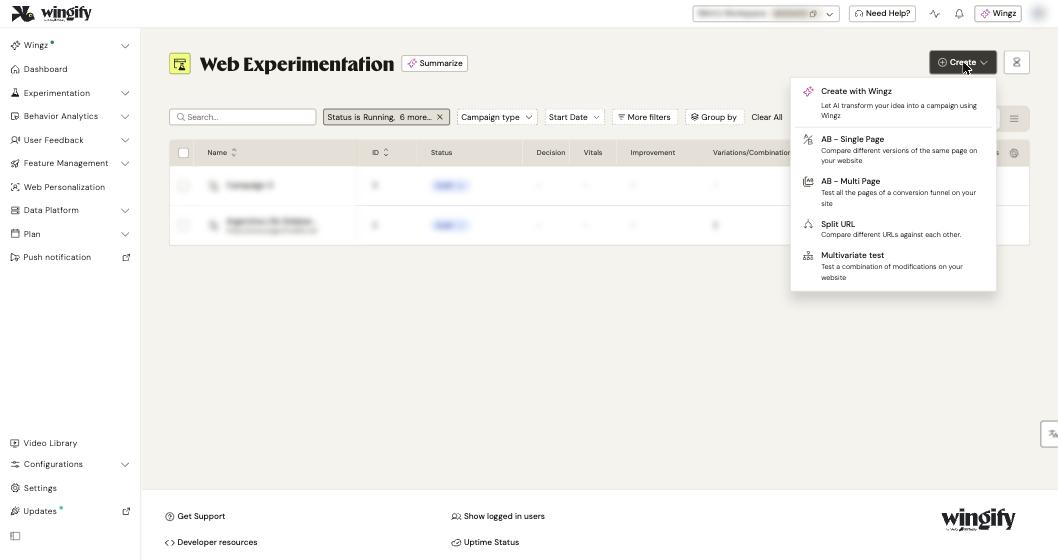
Tip: Not sure this is the right type? See Choose the right test type. You can also pick Create with Wingz to let Wingz suggest a test from your goal.
#3. Define the page in Pages
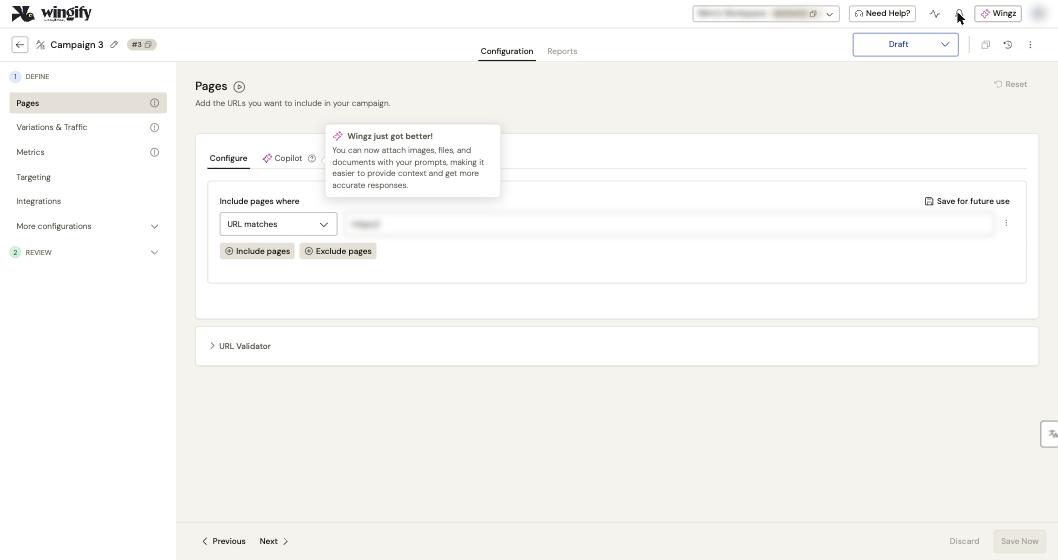
On Pages, under the Configure tab, set Include pages where to URL matches and enter the exact URL of the page. Use URL contains, URL matches pattern or URL matches regex for groups of pages, and Exclude pages for URLs that must stay out. Open URL Validator at the bottom and validate a URL to confirm it is captured. Click Next.
#4. Build your variation in Variations & Traffic
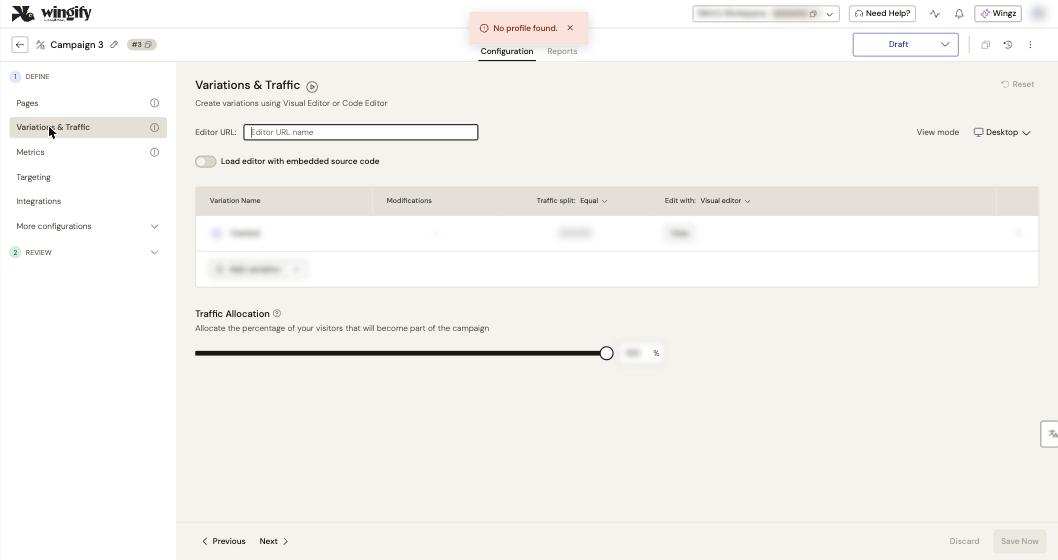
On Variations & Traffic, check the Editor URL, then click Add variation. Choose Visual editor or Code editor in the Edit with dropdown, make your changes and save them. The Modifications column shows how many changes each variation has.
Leave Traffic split on Equal unless you have a reason to change it, and keep Traffic Allocation at 100% to include all visitors to the page. Click Next.
Warning: Decide the traffic split before you start. Changing it while the test runs can invalidate the results.
#5. Choose the primary metric in Metrics
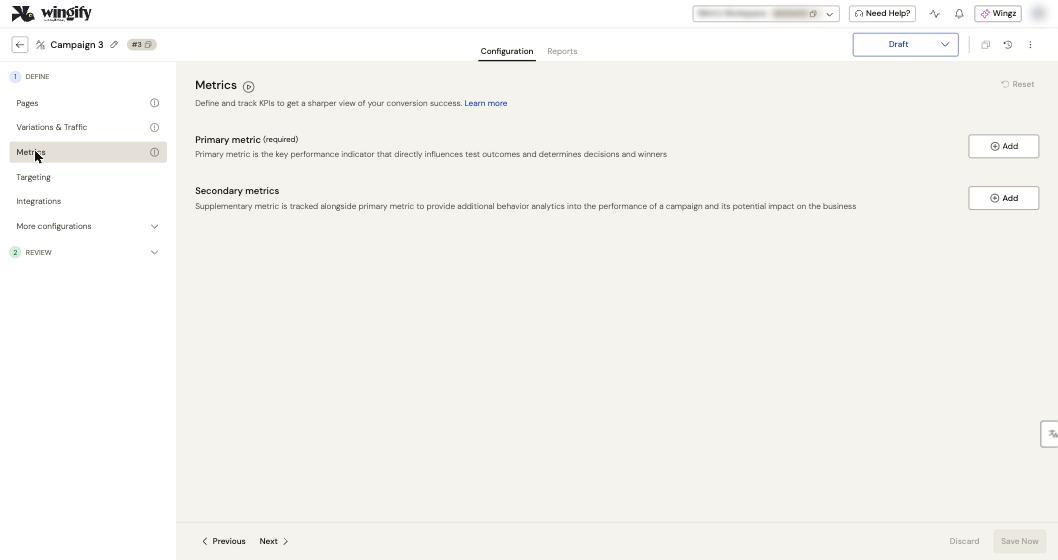
On Metrics, click Add under Primary metric and select an existing metric or create one. The primary metric decides the winner; every campaign needs exactly one. Optionally click Add under Secondary metrics for extra context. Click Next. See Choose the metrics that decide your test.
#6. Set the audience in Targeting
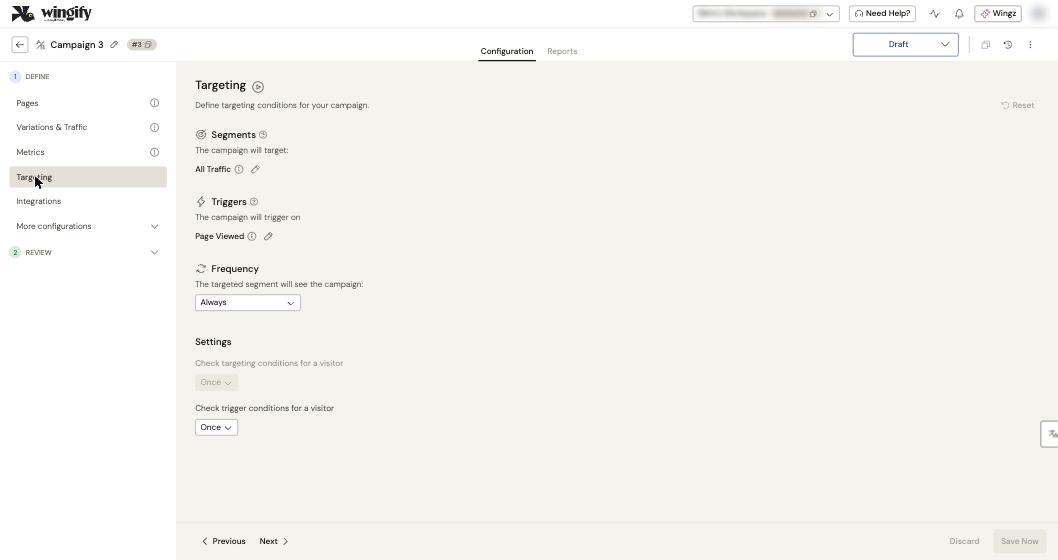
By default, the campaign targets All Traffic, triggers on Page Viewed and uses Always as the Frequency. For a first test these defaults are fine. Click the edit icon next to a setting to change it, then click Next. See Target the right visitors.
#7. Connect tools in Integrations (optional)
On Integrations, select the checkbox next to any integration already configured in your account (for example, Google Analytics) to send this campaign's data there. Click Next.
#8. Review More configurations (optional)
Expand More configurations to find Guardrails, SmartStats Configuration, Manual Activation, Mutually Exclusive, Additional options, Hypothesis and Notes & Labels. None are required. If you are new to testing, keep the SmartStats defaults (Bayesian model, Sequential approach). Click Save Now on any sub-page you change.
#9. Check the campaign in REVIEW
Open REVIEW and go through Configuration summary, then use Live Preview to see each variation on your site, and Variation Screenshots for a quick visual check. See Preview, QA and launch your campaign.
#10. Start the campaign
Click the status dropdown in the top-right corner (it shows Draft) and select Start. The campaign moves to Running and Wingify begins serving variations to visitors who match your targeting.
#Check that it worked
- The campaign shows the Running status in the Web Experimentation list.
- Open the campaign's Reports tab: visitors and conversions start to appear as traffic arrives. The Reports tab is only enabled once the campaign has started.
- If nothing shows after a few hours, check Experiment Vitals in the report header; Wingify flags missing data tracking in the first six hours.
#Common questions
Can I change the traffic split while the test is running? It's not recommended. Changing the distribution mid-test can reverse the apparent winner (Simpson's paradox). Fix the split before you start.
Can I edit a variation after launch? Wingify strongly recommends against it because it skews results. Clone the campaign, make your change in the clone and start that instead.
Do I have to launch immediately? No. From the status dropdown you can choose Schedule Campaign to start later, or move the campaign to In QA to test it internally first.
How long should the test run? At least a week, to cover weekly behavior cycles. Wingify flags conclusions drawn before this minimum runtime in Experiment Vitals.
#Learn more
- Create a Campaign in Wingify
- Set Up Pages for Your Campaign
- Create and Configure Variations and Traffic
- Review and Launch Your Campaign
- Campaign State Lifecycle in Wingify
Help-center sources (9)
- Create a Campaign in Wingify
- Set Up Pages for Your Campaign
- Create and Configure Variations and Traffic
- Set Up Metrics for Your Campaign
- Configure Targeting and Triggers
- Configure Advanced Campaign Configurations
- Review and Launch Your Campaign
- Campaign State Lifecycle in Wingify
- Can I Change The Traffic Distribution While a Test is Running in Wingify