
Build a variation in the Visual Editor or Code Editor
Open a variation in the Visual Editor, make point-and-click or code changes (CSS/JS), and save them to your campaign.
The Wingify Guide can move a cursor on your screen inside the app and walk you through this, click by click (4 steps).
#When to use this
You have an A/B test in draft and need to build the variation: change a headline, recolor a call-to-action, hide a banner, or inject custom CSS/JavaScript. The Wingify Visual Editor lets marketers make these changes by clicking on the page, and gives developers a Code mode for scripts and styles.
Note: The help center documents two editor generations: Visual Editor (classic) and Visual Editor Next (the redesigned editor described here, with Design, Navigate and Code modes). Which one you see depends on your account. The classic Code Editor is only available for non-Data Platform accounts; Data Platform accounts use Code Blocks.
#Before you start
- You have a campaign in Draft with its Pages step completed.
- The Wingify SmartCode is installed on the page. Without it, the editor may load in Fallback mode and you won't be able to preview or launch.
- To use Wingz (AI) editing inside the editor, install the Wingify Chrome extension.
#Steps
#1. Go to Variations & Traffic
Open your campaign and click Variations & Traffic in the left pane. Check the Editor URL: it is the page Wingify loads in the editor. Use the View mode dropdown (Desktop, Mobile, Tablet) to choose the device view.
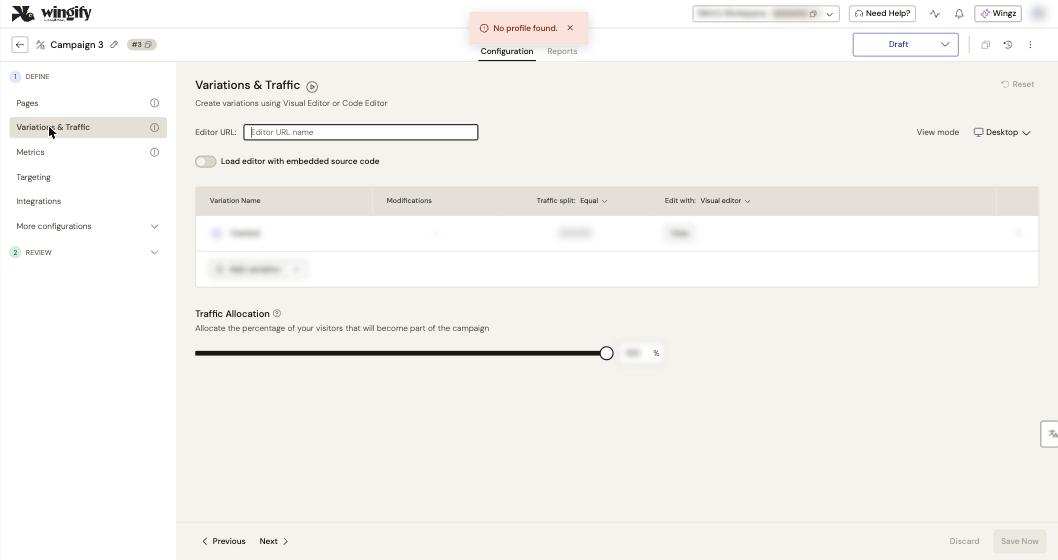
Note: A Load editor with embedded source code toggle appears under the Editor URL. The help center doesn't document it yet; contact Wingify Support before relying on it.
#2. Add a variation and pick the editor
Click Add variation, then click the variation name to rename it. In the Edit with dropdown choose Visual editor (point and click, no code) or Code editor (custom HTML, CSS or JavaScript). To send visitors to another page instead, use the dropdown arrow next to Add variation and select Redirect to another page.
#3. Launch the editor
Click Launch Editor on the variation. The Visual Editor opens in a new browser window with the Control and variation tabs below the top bar. Make sure the right variation tab is selected before you edit.
#4. Make visual changes in Design mode
In Design mode (the default), click any element on the canvas. The sidebar on the right opens with two tabs:
- Edit: change styles (font, colors, background, borders, layout), attributes (IDs, classes, link URLs) or apply element-level HTML/CSS/JS with Edit Code.
- Wingz: describe the change in plain language, for example "Change button text to Start Your Free Trial".
Use the floating icons to Rearrange an element, Track event (create a click, hover, focus or blur metric), or open More options to Select Relative, Cut, Copy, Show/Hide or Remove. Use the Desktop, Tablet and Mobile icons to check each device, and turn off Apply changes to all devices if you want device-specific edits. Switch to Navigate mode to browse the site as a visitor, for example to open a modal before editing it.
#5. Add CSS or JavaScript in Code mode
Click Code in the mode switcher.
- For variation code, select the variation tab, click + Code block, choose a trigger (Campaign executes by default, or Element loaded, DOM ready, Run after another code block, Campaign exit), write code in the JavaScript or CSS tab and click Done.
- For code that runs on all variations including the control, open the Campaign code tab. JavaScript there is post-campaign code by default; click Define Pre-campaign JS for code that must run before Wingify applies changes. Use More options > Include External Stylesheet in the CSS tab to add a library.
Tip: To avoid a flash of original content, use More options > Hide Selected Elements Until Code Runs on the code block.
#6. Review your changes
Open Changes in the left sidebar to see every operation on the variation. You can Hide/Show, rename, edit or delete each change, and filter by device with Applied on. Version History shows who changed what and when.
#7. Save and return to the campaign
Click Save, use Preview to check the result, then Publish & Continue to go back to setup. The Modifications column in Variations & Traffic now shows the number of changes.
#Check that it worked
- The variation row in Variations & Traffic shows a non-zero Modifications count.
- Open REVIEW > Live Preview and preview the variation on your live site; the QA Assistant confirms whether the variation's changes were applied.
#Common questions
My page doesn't load correctly in the editor. What now? The editor shows an error code (for example 0000 for a missing SmartCode, or 0101/0103 for Content Security Policy issues). Install the SmartCode or whitelist Wingify in your CSP; the Wingify Chrome extension is a temporary workaround for loading the page.
My changes don't appear in the preview. Elements added later by AJAX may load after Wingify applies changes. Use the Element loaded trigger on the code block or configure the SPA/SSR settings in the editor Settings. If CSS doesn't override the page style, add !important.
Can I edit a variation after the campaign starts? Wingify strongly recommends against it because it skews results. Clone the campaign and edit the copy.
Where does post-campaign JavaScript run? Only on the campaign URLs set in Configuration > Pages. Pre-campaign JS also runs on URLs used by custom events in your campaign metrics.
#Learn more
- Navigate the Wingify Visual Editor
- Use Code Editor to Configure Custom Scripts
- Configure Pre/Post Campaign JavaScript and CSS in Visual Editor
- Manage Changes for Your Variation in the Visual Editor
- Why is My Website Not Loading Correctly in the Wingify Visual Editor?
- What is Wingify Code Editor? (classic editor)
Help-center sources (8)
- Create and Configure Variations and Traffic
- Navigate the Wingify Visual Editor
- Use Code Editor to Configure Custom Scripts
- Configure Pre Post Campaign JavaScript and CSS in Visual Editor
- Manage Changes for Your Variation in the Visual Editor
- What is Wingify Code Editor
- Why is My Website Not Loading Correctly in the Wingify Visual Editor
- Troubleshooting Variation Changes Are Not Appearing in Wingify