
Create a feature flag and use it in your code
Create a feature flag with variables and variations, connect it to your application with a Wingify SDK, and control it per environment without redeploying.
The Wingify Guide can move a cursor on your screen inside the app and walk you through this, click by click (4 steps).
#When to use this
Your team is shipping a redesigned search algorithm and wants to release it behind a switch: on for internal users first, off instantly if error rates spike. A feature flag in Wingify Feature Management (formerly Wingify Fullstack) wraps that code path. You define the flag, its variables and variations in Wingify; your code asks the SDK which variation a user gets. Rollouts, A/B tests and personalization are then configured as rules on the same flag.
#Before you start
- You need engineering support: Feature Management works through SDK and code-level implementation.
- Pick a supported SDK. Server-side: .NET, Go, Java, Node.js, PHP, Python, Ruby. Client-side: Android, iOS, Flutter, React Native, React (web), JavaScript (web). See the SDK list.
- Your application must be able to pass a stable, unique user ID for each user.
- Any metrics you want to track must exist (or be created) in Data Platform > Metrics, based on events your app sends.
#Steps
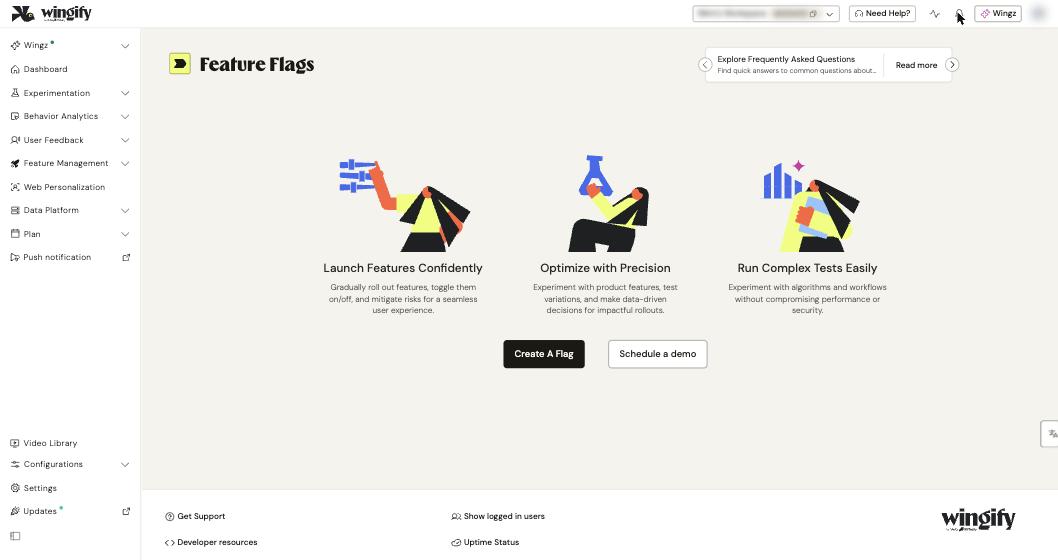
#1. Open Feature Flags and create a flag
Go to Feature Management > Feature Flags and click Create A Flag (or Create at the top right once you already have flags).
#2. Name and describe the flag, and choose its type
Enter a clear Name and a Description of its purpose and scope. Then choose the type:
- Temporary: for flags you'll remove soon, such as gradual rollouts or experiments.
- Permanent: for long-lived configuration, such as premium-feature access or region-specific settings.
#3. Define variables
Add variables for the parts of the feature you want to control from Wingify without deploying code. For each variable, set a Name, a Type (Boolean, Text, Number or JSON) and a Default Value.
Tip: Use a JSON variable for dynamic configuration, for example {"theme": "dark", "itemsPerPage": 20, "discountPercentage": 15}, so you can change several settings at once.
#4. Create variations
Create variations by assigning different values to your variables, for example Model_Version = "GPT-4" and Enable_Auto_Summary = true. You'll use these variations in rollout, testing and personalization rules.
#5. Select metrics
Choose a Primary Metric (used for statistical significance in experiments) and any Secondary Metrics. You can mark a metric as a Guardrail Metric to watch for negative impact during rollouts, for example on error rate or conversion rate.
#6. Add the SDK to your code
In the flag, open the API Settings tab and copy the code snippets. Your developers typically:
- Initialize the SDK with your Account ID and SDK Key (
init()), and set up polling or a webhook so the SDK receives the latest changes. - Build a user context with a unique
idand any custom attributes you'll target on (such asplanType). - Call
getFlag("your_flag_key", userContext)and branch onisEnabled(). - Read values with
getVariable("key", defaultValue)orgetVariables(). - Optionally send events with
trackEvent()and attributes withsetAttribute().
The SDK evaluates rules locally in your application, so no network call is needed to decide which experience to serve.
Note: Unlike Web Experimentation, Feature Management SDKs don't capture browser, OS or device details automatically. Pass them (for example, from the User-Agent) as custom attributes if you want to target on them.
#7. Choose an environment and add rules
Open the flag's Rules tab and pick the environment: Production, Staging or Development (configured by default). Rules are set per environment, so you can switch a feature on in Development while it stays off in Production. Then add a Rollout, Testing or Personalize rule. See Roll out or A/B test a feature server-side.
Tip: An admin can enable Open Access on an environment (for example, Development) so that users without Publish rights can switch rules on and off there. Environments are managed under Configurations > Websites and Apps > your Feature Management project > Configurations tab.
#8. Activate the flag
Make sure both the feature flag and its rules are switched on (Running). To turn the feature off in an emergency, switch the flag or rule off; no redeploy is needed.
#Check that it worked
- In Configurations > Websites and Apps, select your Feature Management project and click Logs to open the advanced debugging console and inspect SDK errors.
- In Feature Management > Feature Flags, the listing shows your flag with per-environment campaign counts. Use Add Filter > Environments to narrow the view.
- Call
getFlag()with a test user ID you forced into a variation and confirm your app shows the expected behavior.
#Common questions
Do I need to register a server-side project first? No. Connecting a server-side project under Websites and Apps was required by the deprecated Wingify Fullstack product; it isn't mandatory in Feature Management.
Why don't my Browser, OS or Device segments match? Feature Management SDKs don't collect these automatically. Capture them in your app and pass them as custom attributes in the user context.
Why do users see inconsistent variations across sessions? Make sure the user ID in userContext is stable, and set a consistent Salt Value in the rule's advanced settings.
How do I clean up old flags? Feature Management includes Tech Debt under Feature Management, which detects and alerts you about unused flags.
#Learn more
- Set Up Feature Flags in Feature Management
- Getting Started with Wingify Feature Management
- How Wingify Feature Management Works
- Configure Environment-Level Permissions using Open Access
- Advanced Debugging in Feature Management
Help-center sources (7)
- Set Up Feature Flags in Feature Management
- Getting Started with Wingify Feature Management
- How Wingify Feature Management Works Concepts and Workflow
- Feature Flag SDKs Supported in Wingify Feature Management
- Configure Environment Level Permissions to Manage Feature Flag Rules using Open Access
- Advanced Debugging in Feature Management
- Monitor and Manage Feature Flags from the Flag Listing Pages