
Invite teammates and manage user roles
Add users to your Wingify workspaces, give each the right role (Owner, Admin, Publish, Design, Browse), and edit, remove or transfer ownership later.
The Wingify Guide can move a cursor on your screen inside the app and walk you through this, click by click (3 steps).
#When to use this
Use this guide when a new team member joins, for example a designer who should build variations but not launch them, or a stakeholder who only needs to read reports. Wingify uses role-based access control. The role you assign determines what each person can view, create, launch or configure in each workspace.
#Before you start
- You must be an Owner or Admin. Other roles can view the user list but can't invite or edit users.
- You can add up to 25 users in a rolling 24-hour period.
- If your account uses single sign-on (SSO), invitees sign in through your identity provider unless you turn off SSO for that user.
#Steps
#1. Choose the right role
Wingify has five roles:
| Role | Typical use | Key limits |
|---|---|---|
| Owner | Account holder | All permissions, including deleting the account |
| Admin | Manages users and settings | All except deleting the account and a few Owner-only actions |
| Publish | Runs the testing program | Can launch, pause, end and edit running campaigns; can't manage users or account settings |
| Design | Builds variations | Can create and edit draft campaigns; can't launch, pause or edit running campaigns |
| Browse | Stakeholders, read-only | Can view campaigns and reports only |
Reports are read-only for every role. Only Owners and Admins can manage integrations, IP restrictions, 2FA enforcement and SSO. See Roles and Permissions in Wingify for the full table.
#2. Open the Users page
In the left sidebar, click Settings, then Users under Accounts. You see everyone with access, including pending invitations. Older help articles describe reaching Settings from the profile menu in the top-right corner.
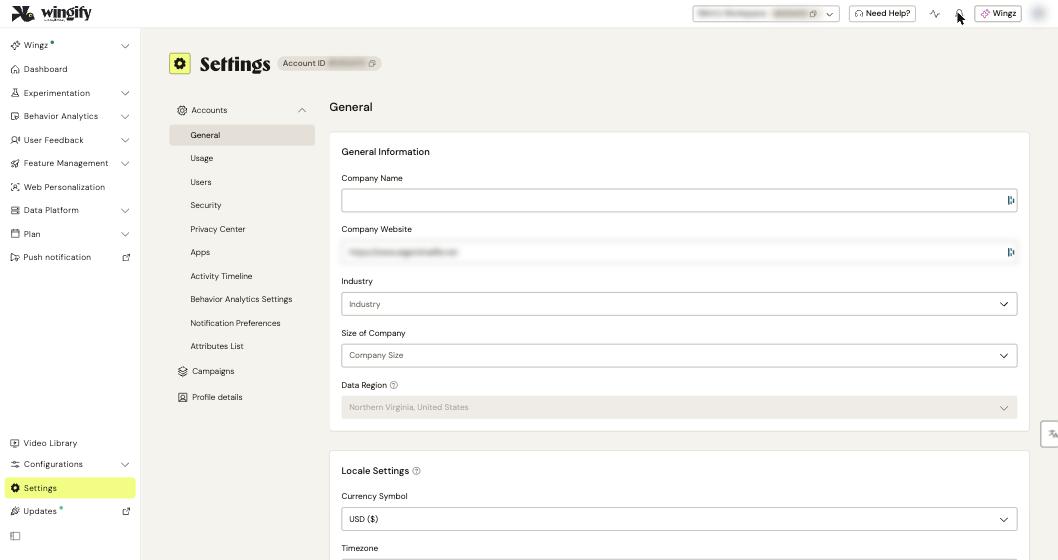
#3. Invite the user
Click Add User. In the Add User popup:
- Enter the person's address in Email.
- Select the workspace in Workspace.
- Select the role in Permission.
- Click Invite.
The user appears in the list marked (invited) and receives an email to set a password. The invitation is valid for 24 hours. If it expires, click the vertical ellipsis (⋮) next to the user and select Resend Invitation.
Note: If you assign the main workspace, the user gets access to all other workspaces with the same permission. The first workspace you assign becomes their default workspace at first sign-in.
#4. Change a role or workspace later
Click ⋮ next to the user and select Edit. Change the Name, workspace or access level, then click Save. Only the user can change their own email address. Owners and Admins of the main workspace can edit everyone except themselves. Admins of another workspace can edit only that workspace's users.
#5. Remove a user
Click ⋮ > Delete > OK. The user immediately loses access to that workspace.
#6. Transfer account ownership (optional)
The new owner must already be a verified user with main workspace access. Invited users can't be made owner. Click ⋮ next to that user and select Make Owner:
- If you are the Owner: click Send Security Token, enter the 8-digit code sent to your email (valid 10 minutes) and click Confirm.
- If you are an Admin: click Send Approval Request. The change happens when the current Owner approves it from their email.
After the transfer, the previous owner becomes an Admin.
#Check that it worked
The user appears on the Users page with the role you chose. The (invited) tag disappears once they log in. Ask them to open Experimentation > Web Experimentation to confirm they see the expected campaigns and buttons. For example, a Design user sees drafts but can't start them.
#Common questions
Can I add the same person to several workspaces with different roles? Yes. To add an existing user to another workspace, first switch to that workspace, then add them there. You can also assign a new workspace through Edit.
Why can't I add a colleague to our SSO-enabled workspace? Users who already exist in a different workspace can't be added to an SSO-enabled workspace. Users from an SSO-enabled workspace can be added to a non-SSO workspace.
The owner has left the company. How do we transfer ownership? Email Wingify Support from a registered address. Include the new owner's email and one verification method, such as a confirmation from the contract signatory or a domain validation.
Can a Design user launch a test? No. Launching, pausing, ending and resuming campaigns requires Publish, Admin or Owner.