
Collect feedback with an on-page survey
Create a website survey, target it to the right page, visitors and moment, write questions (or start from a template), then launch it and read the responses.
The Wingify Guide can move a cursor on your screen inside the app and walk you through this, click by click (5 steps).
#When to use this
Your analytics show many visitors leaving the cart page, but not why. An on-page survey asks them directly, at the right moment. For example, when a visitor shows exit intent on /cart, you can ask: "What stopped you from completing your purchase today?" You can also run NPS, feature-satisfaction or onboarding surveys, and send the same survey as a link or show it in your app.
#Before you start
- For website surveys, the Wingify SmartCode is installed on the target pages. Surveys use the existing SmartCode; no extra code is needed.
- For mobile app surveys, your app uses the Wingify Mobile Insights SDK. Link surveys need no code.
- Survey responses count toward your plan's survey quota. A response counts once the visitor answers at least one question, whether or not they reach the end.
#Steps
#1. Create a survey and choose a platform
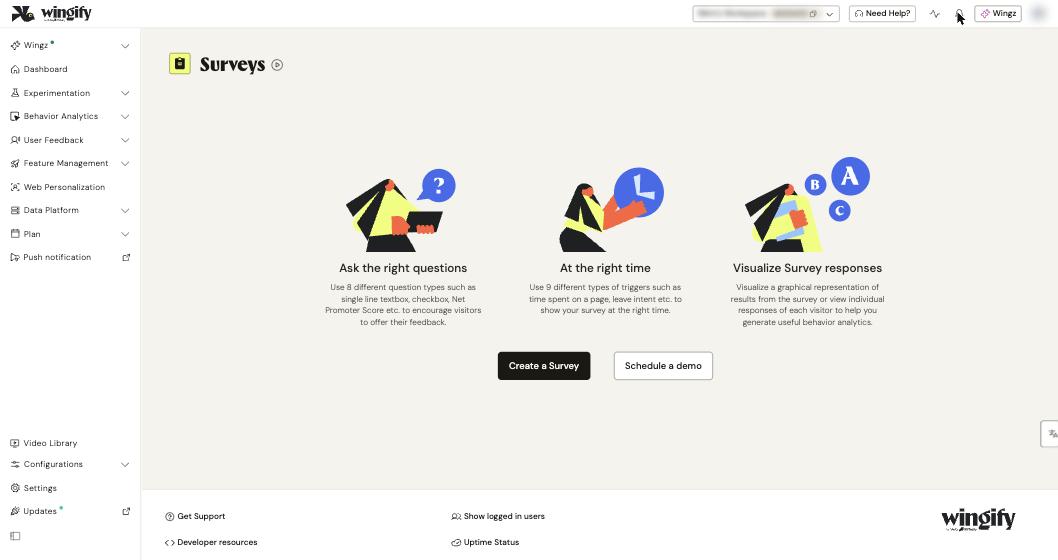
Go to User Feedback > Surveys and click Create a Survey (or Create if you already have surveys). On the Configure screen, choose Website, Mobile App or Link. This guide follows Website.
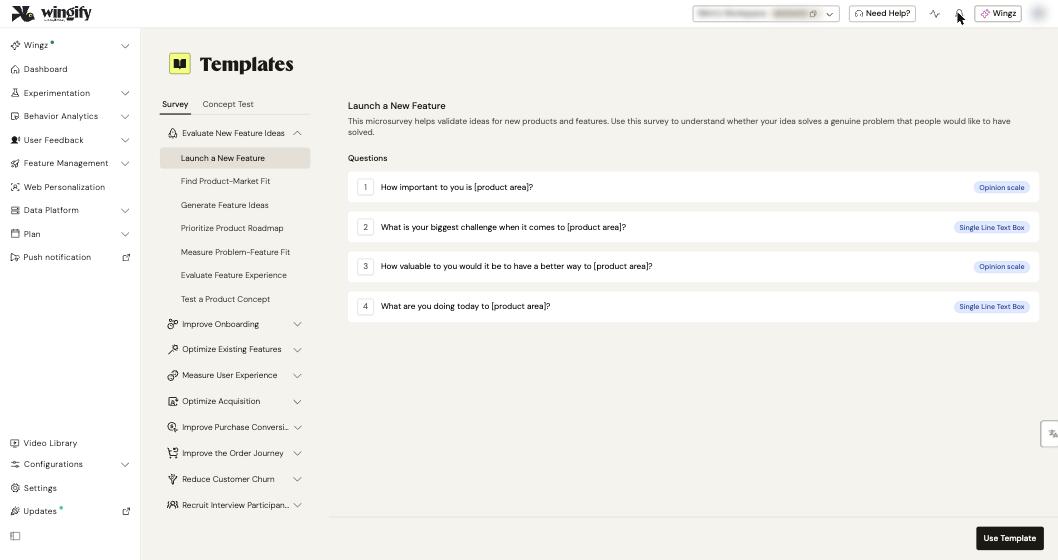
Tip: Prefer to start from proven questions? Go to User Feedback > Templates, pick a category such as Evaluate New Feature Ideas, select a template and click Use Template. Then choose Website, Mobile app or Link.
#2. Define where the survey appears
In the URL section, pick a URL pattern type and enter the page, for example https://www.example.com/cart. Use Include URL and Exclude URL to refine the pages (for example, exclude login pages). Enter a full page URL in Enter URL of the page for which you want to preview; Wingify loads it to preview your widget.
#3. Choose who sees it and when
In Audience and Traffic, keep all visitors or pick a segment from Standard Segments, My Segments or Custom Segment. You can also click Copilot and describe the audience in plain words. Set the traffic percentage if you only want to survey a share of visitors.
In Trigger, choose a Standard Trigger, a saved trigger from My Triggers, or build a Custom Trigger from events like clicks, scroll depth and form submissions. Copilot can build it from a prompt such as "Show the survey when a user tries to leave after reading half the page." Click Next.
#4. Add your questions
On the Question Configuration page, add questions in any of these ways:
- Generate with Copilot – describe your goal and let Copilot draft the questions.
- Add New Question – pick a type: Single-line text box, Multi-line text box, Radio button, Checkbox, Dropdown, Multi-select List, Opinion Scale, Net Promoter Score (NPS), Star Rating, Emoji Rating or Intro Prompt. (Matrix is available for link surveys only.)
- Use Templates – choose Add to existing questions or Replace existing questions, then Proceed.
- Add from question bank – reuse questions from the General or Custom tab.
For each question, set Required on or off, and use Flow Options > Continue to to skip to a question based on the answer. Optionally click Add a welcome message and Edit thank you message. To serve other languages, add them from the language dropdown and select Sync from English to auto-translate.
Warning: Templates contain placeholders such as [product area]. They aren't filled in automatically, so replace them before you launch.
Click Next.
#5. Match the look to your site
On the Design tab, set the initial state (Open or Closed) and the Position. Then pick a Theme, or create a New Theme with custom CSS (Pro plan and above). You can also toggle Full width Button, Show Progress Bar and Show Wingify Branding. Click Next.
#6. Control frequency and limits, then launch
On Advanced Options, set:
- Survey Frequency – the minimum days before the same visitor sees it again.
- Repeat Frequency – Display only once, Display until user responds, Display until every question is answered or Recurring survey.
- Total and daily response limits, Enable Scheduling, and Add to mutually exclusive group so visitors don't get several surveys at once.
Click Review and Start. On Campaign Ready to Start, choose Start Now, or Preview Campaign and Start Later to test it first.
#Check that it worked
Use Preview Campaign and Start Later and open the preview on your page to walk through the questions. Once live, open the survey from User Feedback > Surveys and go to the View Report tab. Overview shows Displayed, Attempted and Completed counts, charts for choice questions and word clouds for text answers. Respondent View and Question View show individual answers.
#Common questions
If a visitor closes the survey, will it come back? Not if they click X. If they only minimize it, navigate away or refresh, it can reappear, depending on your frequency settings.
Are partial answers saved? Yes. Each answer is recorded when the visitor clicks Next. A survey counts as attempted as soon as the visitor interacts with it.
How many questions should I add? There's no limit, but more questions lower completion. Wingify recommends at most 5.
Can I show a survey only to visitors in one test variation? Yes. Use a custom trigger with the onVariationShown callback and your campaign and variation IDs. See the Surveys FAQs.
Why isn't my survey showing? Check that the URL pattern matches the page, that the SmartCode loads, and that no privacy blocker or CSP rule blocks it. After publishing, hard-refresh the page, because a cached script may still be running.
#Learn more
- Create the Survey and Choose the Survey Platform
- Configure Survey Audience and Triggers (Web)
- Question Types in Wingify User Feedback Surveys
- Use Templates in Wingify User Feedback
- Interpret Survey Reports in Wingify User Feedback
Help-center sources (10)
- Introduction to Wingify User Feedback Surveys
- Create the Survey and Choose the Survey Platform
- Configure Survey Audience and Triggers Web
- Add and Configure Survey Questions
- Question Types in Wingify User Feedback Surveys
- Customize the Survey Appearance Web
- Configure Survey Delivery Advanced Options
- Use Templates in Wingify User Feedback
- Interpret Survey Reports in Wingify User Feedback
- Wingify User Feedback Surveys FAQs