
Automate reporting with Wingz Agents and Workflows
Build reusable Wingz agents for recurring analysis and chain them into workflows that run on a schedule or on campaign events and email the results.
The Wingify Guide can move a cursor on your screen inside the app and walk you through this, click by click (6 steps).
#When to use this
Every Monday, someone on your team pulls the status of all running tests into an email, and every time a test is paused, someone writes a debrief. Wingz Agents save a reusable analysis (goal plus detailed prompt) that you can call in chat. Wingz Workflows chain agents together and run them automatically, on a schedule or when a campaign changes status, and email the result to your stakeholders.
#Before you start
- Creating agents and creating, editing, testing or publishing workflows require the Wingz Advanced plan (or a trial). On Wingz Core, templates and existing workflows are view-only.
- Agents and workflows use Wingz Credits each time they run, not when you configure them. For example, the Weekly Experiment Status Digest template uses about 50 credits per run.
- Agents analyze and report; they can't modify your campaigns.
#Steps
#1. Create an agent
Go to Wingz > Agents and click Create (or Create your agent). You can also click Use now on a template such as Campaign Overview, Weekly Behavior Analytics Report or Heatmap & Behavior Analyzer.
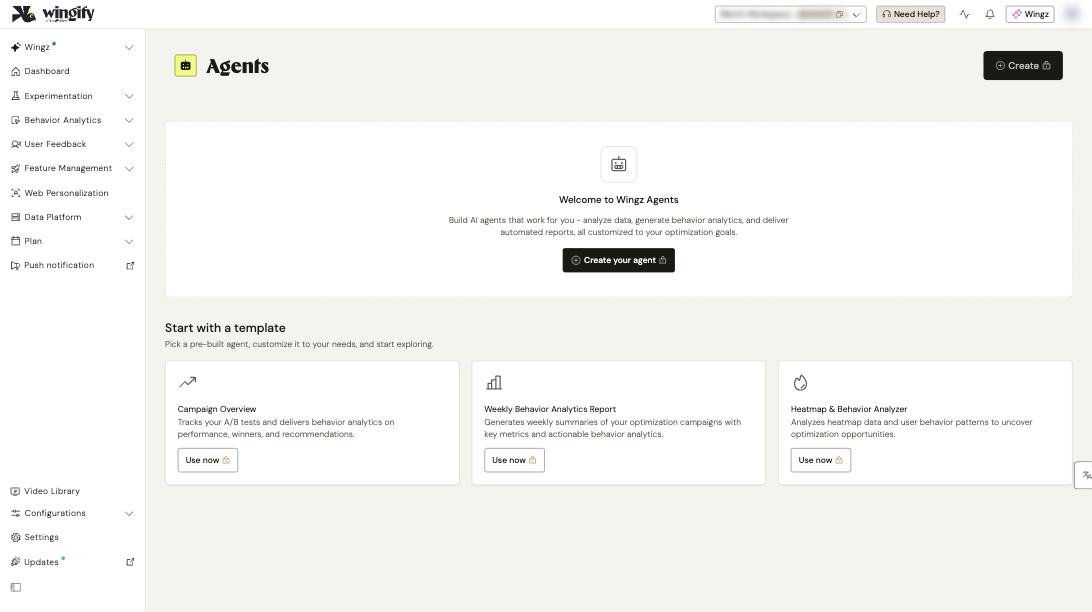
Fill in:
- Agent Name: a clear purpose, for example "Checkout Page Analysis Agent".
- Agent ID: generated from the name. You can only change it now; it's locked after creation.
- Goal: what the agent should accomplish, for example "Analyze conversion rates on the new checkout page".
- Prompt: click Generate Prompt to draft it from your goal, or write it yourself. A good prompt defines a role, a step-by-step workflow and an output format.
Click Create.
#2. Test and refine the agent
Click Chat at the top right of the Agents page, enter a question and review the answer. If it's too generic, click Edit, make the prompt more specific about what to analyze and how to format the output, and click Save.
Tip: In Wingz > Chat, click + > Agents, or type @ followed by the agent name, to call it. You can use several agents in one conversation; each builds on the previous one's output.
#3. Start a workflow
Go to Wingz > Workflows. Pick a template from Choose a workflow template (for example, Automated Campaign Debrief, Weekly Experiment Status Digest or Conversion Drop Alert; click See All for more), or click Start from scratch / Create for a blank canvas with a Start and an End node.
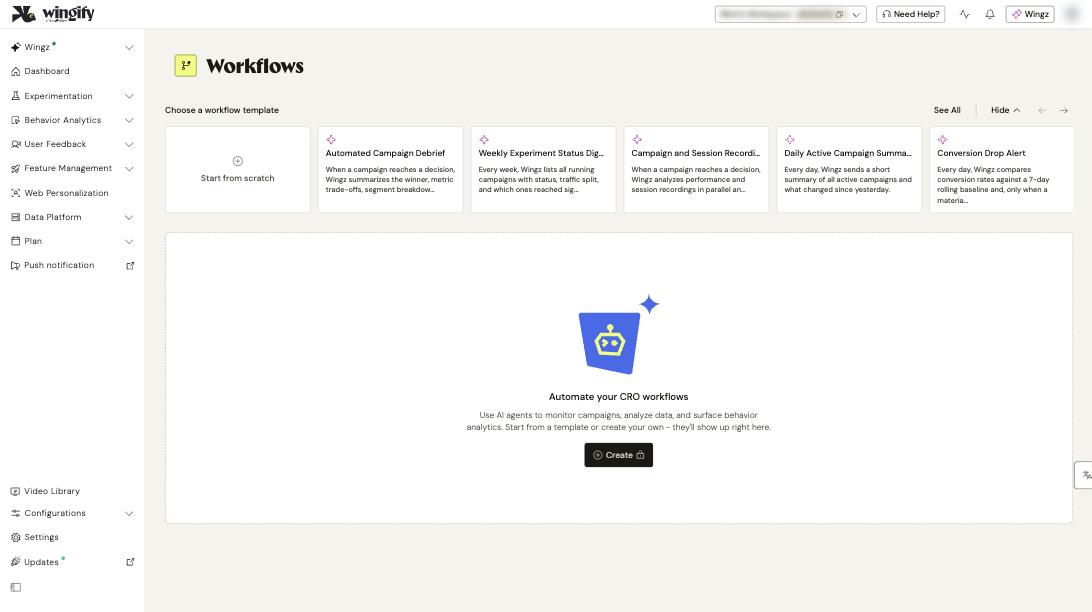
Tip: Prefer to describe it? In the Wingz Workflow Assistant panel on the left of the canvas, write one message covering the trigger, the analysis and who to notify, for example: "Every Monday, summarize all running A/B tests and email the team".
#4. Set the trigger
Click the Start node and choose a Trigger Type:
- Time Based: set Schedule to Daily (7 AM EST), Weekly (Mondays, 7 AM EST) or Monthly (first day of the month, 7 AM EST).
- Condition Based: choose a Campaign Type (for example, AB), a Campaign Event (for example, Paused) and the Campaigns to watch.
#5. Add agent and logic nodes
Drag an Agent node from the Wingz section of the node palette and connect it after Start. In Select an agent, choose one of your agents, choose Wingz and describe the task in Additional Instruction, or create a new agent. Click Save.
From Logic, add a Condition node to route on the previous output (for example, only notify if the output contains "significant"), a Duplicate node to run up to 5 agents in parallel, and a Merge node to combine their results.
#6. Configure the email
Click the End node and set Output Type to Notify (or Do Nothing). Under Notify me on, select Email and add recipients. Select Generate AI email summary for a concise summary (you can edit the AI summary instructions), or leave it unchecked to send the raw output.
#7. Test, then publish
Click Save, then Test to run the workflow once. For a Condition Based trigger, pick a campaign in Run Workflow. In Previous run history, click View Details to check each node's output. When the results look right, switch on the Publish toggle.
#Check that it worked
- On the Workflows list, use View last runs from the Action menu. Completed nodes show a green checkmark; failed nodes a red cross.
- Recipients receive the email after each run.
- Track credit usage from the Account usage activity icon in the header.
#Common questions
My workflow shows as Paused. Why? A workflow is paused whenever its Publish toggle is off. Switch it on to run on its trigger.
How do I edit a published workflow? Switch off Publish, click Edit, make your changes and Save, then test and publish again.
Can an agent run automatically when a campaign is paused? Not by itself. Build a workflow with a Condition Based trigger on the Paused event and add the agent as a node.
The run history is empty. What's wrong? The workflow hasn't run yet: its trigger hasn't fired or Publish is off. Click Test to generate a first run.
#Learn more
- Introduction to Wingz Agents
- Create, Configure, and Use Wingz Agents
- Introduction to Wingz Workflows
- Build a Wingz Workflow Manually to Automate Tasks
- Explore Wingz Workflow Templates
- Manage Wingz Workflows